Set Up & Use the Self-Service Front Desk Kiosk
Let members check in, book, sign up and pay on a tablet at your door.
Turn a tablet or computer at your entrance into a self-service front desk, where members check in and book their session and new visitors sign up and pay without waiting for staff.
What Members Can Do at the Kiosk
| Who | What they can do |
|---|---|
| Members | Scan their QR code or type their PIN, then check in to open gym, check in to today's booking, reserve or join the waitlist for a class today, book an appointment for today, sign documents, or buy a plan |
| New visitors | Tap New here? Sign up, enter their details, choose a plan, sign documents, pay, and check in to their first visit |
Nothing is recorded the moment a member scans. The kiosk shows what they can do and waits for them to confirm, so someone who only came to reserve a class is not checked in by mistake.
Setting Up the Kiosk
- Log in to the dashboard on the device you want to use as the kiosk
- Click the monitor icon (Frontdesk mode) in the top navigation bar
- Confirm by clicking Yes, I'm sure
The screen switches to the kiosk. It shows your gym's name and logo, a New here? Sign up button, the QR code scanner and the PIN pad.
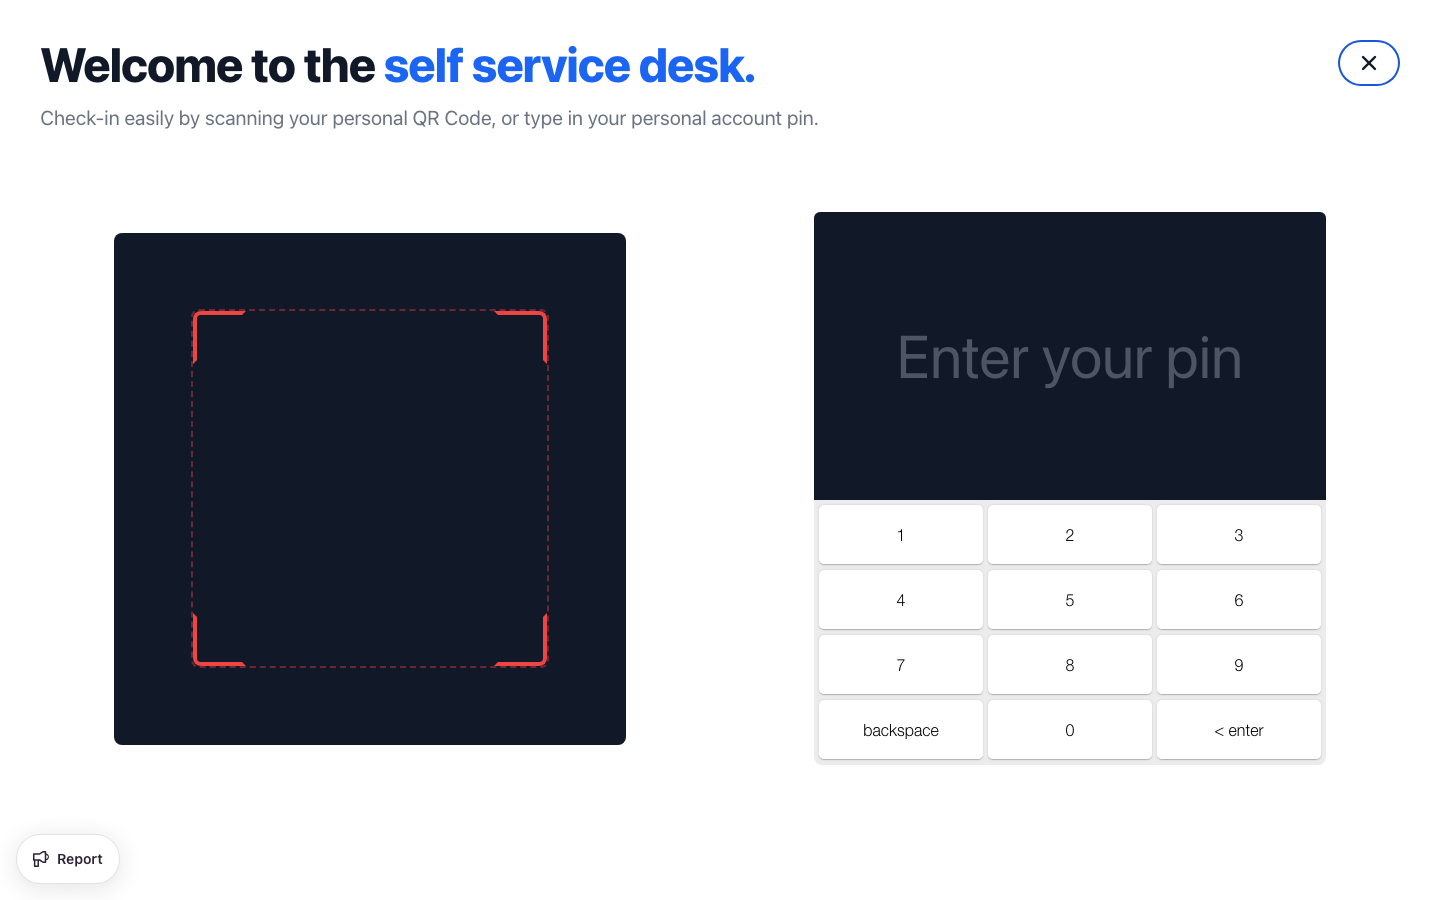
Your gym's name and logo come from Settings → General. Upload a logo there if the kiosk shows only your name.
Exiting the Kiosk
- Click the X button in the top corner
- Enter your password
- You're returned to the dashboard
The password stops members from leaving the kiosk and reaching your dashboard.
Checking In
How Members Identify Themselves
Members can use either:
- QR code from the Finegym mobile app, or a printed member card
- 6-digit PIN, typed on the on-screen keypad and confirmed with Enter
While the kiosk looks the member up, it shows Looking you up…. A window then opens with the member's name and photo, so they can see it's their own account.
The Check-In Window
The window lists everything the member can do right now, in this order:
| Row | What it does |
|---|---|
| Open gym | Checks the member in for a regular visit. One button per usable membership, showing sessions left or Unlimited |
| Booked sessions | Today's classes and appointments the member has already booked. Check in records their arrival |
| Classes today | Other classes later today. Reserve books a spot, or Join waitlist when the class is full |
| Appointments | Appointment types the member's plans allow. Shows who hosts them and the times still free today |
| Buy a plan | Lets the member buy a new plan on the spot |
Nothing is selected when the window opens, not even open gym or a booking: the member taps what they want, then confirms with the button at the bottom of the window. Nothing is recorded until they do. After the member reserves a class, it appears under Booked sessions, where they can tap it and confirm to check in.
Classes that can't be reserved say why, for example Fully Booked, Booking not open yet or Booking closed.
Booking an Appointment
- Tap an appointment type under Appointments
- Choose a coach, or leave First available
- Pick a time under Pick a time
- If the member has more than one plan that covers it, choose one under Use membership
- Tap Book
The kiosk only offers times for today, and follows the appointment type's minimum booking notice. Members book further ahead from the mobile app or your gym's website.
When the Window Closes on Its Own
The check-in window closes after one minute without a touch, and the kiosk goes back to its home screen. This stops the next person in line from using the previous member's account.
Signing Documents at the Kiosk
If your gym requires documents to be signed before check-in, a member with unsigned documents sees Documents to sign as soon as they scan. They read each document, sign with their finger, and tap I agree and sign. The check-in window opens as soon as the last one is signed.
Turn this rule on or off in Settings → Documents with Require document signing before check-in. See Digital Documents & Waivers for creating documents and assigning them to plans.
Buying a Plan at the Kiosk
Members can buy a plan themselves, for example to renew an expired one or add a class pack:
- Tap Buy a plan in the check-in window
- Choose a plan and tap Continue
- Pay on the tablet, or at the desk when card payments aren't set up (see Payments at the Kiosk)
- Sign any documents the plan needs
Once the plan is paid, the member sees Your plan is active. and can check in straight away. The plan is only added to the member's account once it's paid, so a member who walks away from the payment leaves no plan and no unpaid invoice behind.
A member with no usable plan and nothing to book today goes straight to Buy a plan after scanning.
The kiosk only offers plans that are not archived and have Show on website turned on in the plan settings. Plans for staff use only stay behind the desk.
New Member Sign-Up
A visitor without an account taps New here? Sign up on the kiosk's home screen. Sign-up has five steps:
- Your details — Full name, email, phone number and date of birth. Address and a parent or guardian are optional. Any custom fields you mark as required are asked here too
- Choose a plan — The same plans as Buy a plan above
- Payment — Pay on the tablet, or at the desk when card payments aren't set up. Free plans skip this step
- Sign the documents — Any documents your gym requires, including those assigned to the chosen plan
- All set — The member is welcomed by name and can check in to their first visit with Check in now
The new member receives their QR code and PIN by email, so they can use the scanner next time.
If the email already belongs to a member, the kiosk says Already a member? Use the scanner or your PIN instead. A visitor who closed sign-up after the first step can scan in or use their PIN and finish with Buy a plan.
Sign-up goes back to the home screen after three minutes without a touch, so a half-filled form is never left for the next person. Cancel sign-up does the same straight away.
Payments at the Kiosk
| Your setup | What the member sees |
|---|---|
| Stripe connected and able to take payments | The amount, and a card payment form. Pay now takes the payment on the tablet |
| Stripe not connected, or not yet able to take payments | The plan and its price, and a note to pay at the desk. Nothing is added to the member's account |
| Free plan | No payment step. The plan is activated straight away |
The plan is added to the member's account only once Stripe confirms the payment. After a card payment the kiosk shows Confirming your payment… for a few seconds while that happens, then continues. If it takes longer than 30 seconds, the member sees Your payment went through. Our staff will check you in. The plan appears on their profile as soon as Stripe confirms it.
When a member is sent to pay at the desk, open their profile, add the plan with Assign membership, record the payment, then check them in. See Member Operations for assigning a plan.
When the Kiosk Sends Members to the Desk
| What the member sees | Why | What to do |
|---|---|---|
| Please ask at the desk. | The member is blocked | Review the member's profile and unblock them if appropriate |
| Please pay at the desk. Our staff will check you in. | Card payments aren't available on the kiosk, so nothing was bought | Assign the plan they chose from their profile, take the payment, then check them in |
| Your payment went through. Our staff will check you in. | The card was charged, but Stripe hadn't confirmed it yet | Wait a moment for the plan to appear on their profile, then check them in. Don't charge them again |
| Already checked in today | Open gym counts one visit per day | Nothing, unless it's a genuine second session. Staff can record it from the member's profile with Check in anyway |
Sound Feedback
The kiosk plays a sound for each result, so members notice it even when looking away:
- Success — Checked in, booked, or paid
- Error — Something went wrong, or the member needs to go to the desk
Best Practices
- Use a dedicated tablet or monitor, mounted near your entrance
- Keep it plugged in and on a stable internet connection
- Make sure the camera faces members and the area is well lit, so QR codes scan quickly
- Test the volume so feedback sounds are heard
- Connect Stripe so walk-ins can pay on the tablet instead of queueing at the desk
- Turn on Show on website only for plans you're happy for anyone to buy
Troubleshooting
"We Don't Recognise That PIN"
The PIN typed doesn't belong to any member. Ask the member to try again, or look them up in Members to check their PIN.
The Scanner Doesn't Read QR Codes
- Allow camera access in the browser
- Improve the lighting, and ask the member to hold the code steady
- Ask the member to type their PIN instead
No Plans Show Up at Sign-Up
The kiosk shows No plans are available for sign-up. Please ask at the desk. when no active plan has Show on website turned on. Turn it on for the plans walk-ins should be able to buy, in each plan's settings under Membership Plans.
The Payment Form Doesn't Appear
Card payments need a connected Stripe account that can accept charges. Check Stripe Bank Connection and finish any steps Stripe still asks for. Until then, members are sent to pay at the desk.
A Member Doesn't See a Class They Booked
The kiosk only shows today's classes and appointments. Bookings for other days are in the member's app, or in their profile under Reservations.
Related Topics
- Gym Check-In Methods - Checking members in from the dashboard, QR scanner and PIN
- Digital Documents & Waivers - Documents members sign before check-in
- Membership Plans - Creating the plans members can buy
- Stripe Bank Connection - Accepting card payments
- Attendance Tracking - Reviewing check-ins after the fact