Migration Planning & CSV Import
Switching to Finegym from another system? We offer free data migration assistance for all plans. This guide covers planning your migration and importing members via CSV.
Overview
Migration options:
- Assisted Migration - Finegym team imports your data (free)
- CSV Import - Self-service bulk import
- Manual Entry - Add records individually
Assisted Migration
What's Included
Free migration assistance includes:
- Member data import
- Membership history
- Class/appointment history
- Product catalog
- Contact information
How It Works
- Export data from your current system
- Send to Finegym via secure upload
- We process and map your data
- Review together before going live
- Go live with your data in Finegym
Requesting Migration
Contact support to start:
- Email: support@finegym.io
- Subject: Data Migration Request
- Include: Current system name, approximate records
Timeline
Typical migration takes 1-2 weeks:
- Data review: 2-3 days
- Processing: 3-5 days
- Review and adjustments: 2-3 days
- Go live: Same day
Migration Wizard
Location: Migrations
Finegym provides a guided 4-step migration wizard to import members and get them set up.
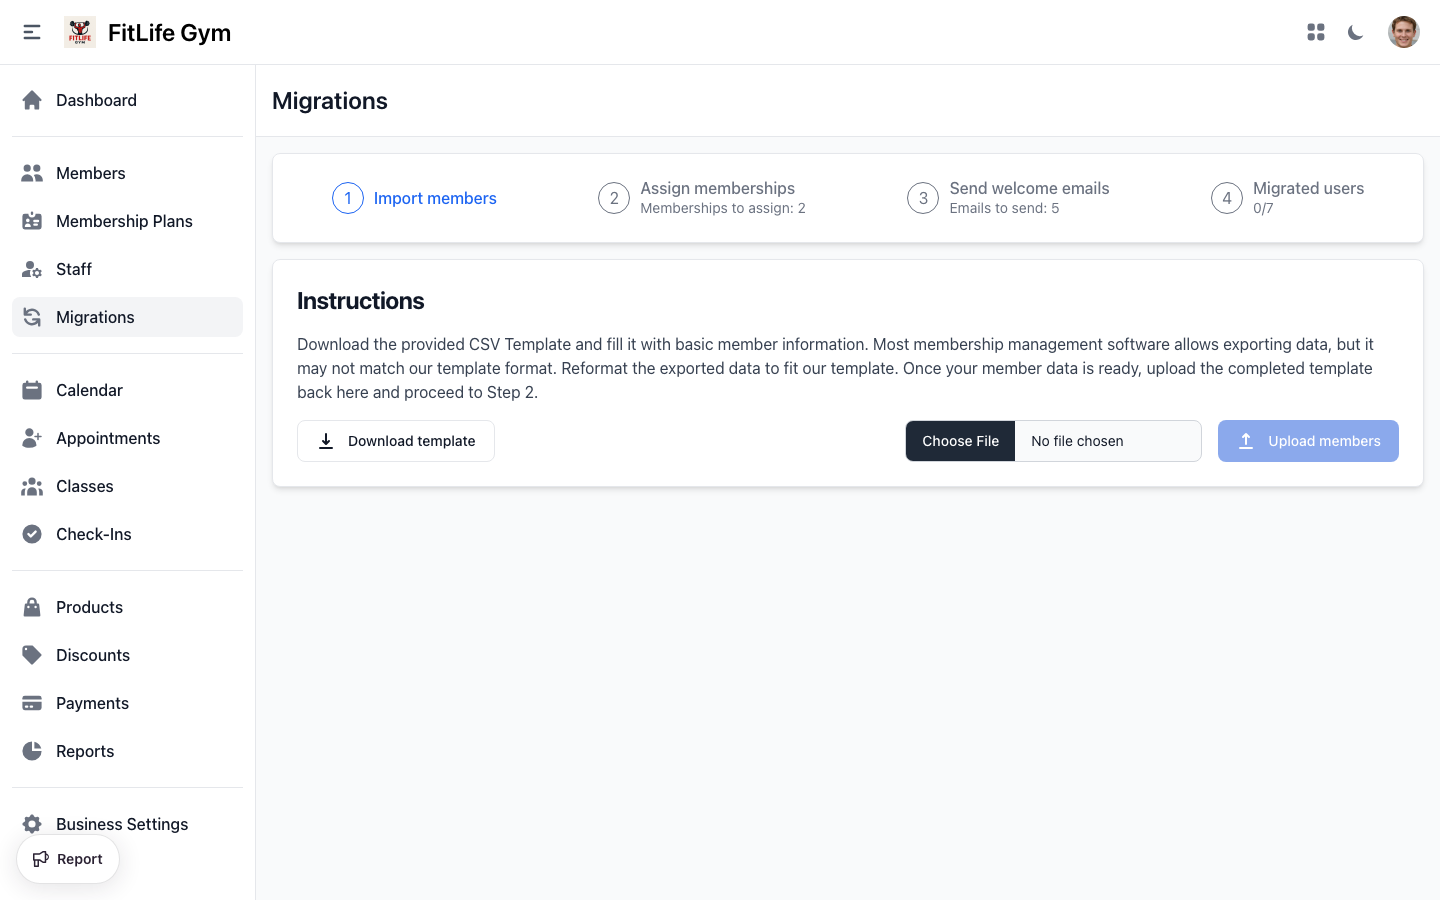
Step 1: Import Members
Upload your member data via CSV:
- Click Download Template to get the CSV template
- Fill in the template with your member data (see fields below)
- Click Choose File and select your completed CSV
- Click Upload and review import results
- Failed rows are listed with specific error messages
CSV Template Fields
- name — Full name (required)
- email — Email address (must be unique) (required)
- country — Country code (US, GB, etc.) (required)
- phone — Phone number (optional)
- birthday — Date of birth (YYYY-MM-DD) (optional)
- language — Preferred language (en, bs, es, pt) (optional)
- street_address — Street address (optional)
- city — City (optional)
- state — State/Province (optional)
- postal_code — ZIP/Postal code (optional)
Step 2: Assign Plans
Assign membership plans to imported members:
- You'll see a list of imported members pending plan assignment
- Search for specific members using the search bar
- Select members individually or use bulk selection checkboxes
- Click Assign to selected (or use the dropdown on individual rows)
- Choose the plan type:
- Punchcard: Set remaining punches and optional expiry date
- Non-recurring: Set end date
- Recurring: Set next bill date
Create your membership plans and discounts first. Links to plan setup are provided on this page.
Step 3: Send Welcome Emails
Notify imported members about their new accounts:
- Members with assigned plans appear in this list
- Select members individually or in bulk
- Click Send to selected to send welcome emails
- Members receive login credentials and app download instructions
Step 4: Review Migrated Users
Verify the completed migration:
- View all members who have been fully migrated
- Each entry shows: name, email, membership plan, end date, next bill date, and punches remaining
- Use search and pagination to review large lists
Migration Status Tracking
Each member progresses through these statuses:
- Imported — Member data uploaded via CSV
- Membership Assigned — Plan has been assigned
- Welcome Email Sent — Migration complete
Import Tips
- Clean data before importing
- Remove duplicates
- Use consistent date format (YYYY-MM-DD)
- Verify email addresses are valid
- UTF-8 encoding for special characters
Data Formats
Date Format
Use ISO format: YYYY-MM-DD
Phone Numbers
Include country code:
- +1234567890
- +44 20 1234 5678
- Spaces and dashes are OK
Country Codes
Use 2-letter ISO codes:
- US - United States
- GB - United Kingdom
- CA - Canada
- AU - Australia
Referral Sources
Use these values:
- walk_in
- advertisement
- website_blog
- existing_member
- staff_member
- other
Pre-Migration Checklist
Before Starting
- Export all data from current system
- Clean and verify data
- Identify duplicate records
- Note any custom fields needed
- Document current membership plans
- List active discounts
Data Cleanup
- Remove test accounts
- Merge duplicate members
- Verify email addresses
- Standardize phone formats
- Fix data inconsistencies
Planning
- Choose migration date
- Plan communication to members
- Schedule training for staff
- Prepare for parallel operation if needed
Membership Migration
Handling Existing Payments
For members mid-billing cycle:
- Set start date to current billing date
- Prorate first payment if needed
- Configure next billing date
Maintaining History
Historical data options:
- Import attendance history (assisted migration)
- Import payment history (assisted migration)
- Start fresh from migration date
Troubleshooting
Import Errors
"Email already exists"
- Duplicate email in file
- Member already in system
- Remove duplicate or update existing
"Invalid date format"
- Use YYYY-MM-DD format
- Check for text in date fields
"Required field missing"
- Name and email required
- Check for empty cells
"Invalid phone number"
- Include country code
- Remove special characters
Data Not Matching
If imported data looks wrong:
- Re-export from source system
- Verify encoding (UTF-8)
- Check for hidden characters
- Review field mapping
Missing Records
If records are missing:
- Check error report
- Verify CSV row count
- Look for filter issues
- Re-import failed rows
Related Topics
- System-Specific Migration - Guides for migrating from MindBody, WellnessLiving, etc.
- Adding & Managing Members - Managing imported members
- Membership Plans - Setting up plans
- Account Setup - Create your account
- Business Setup - Configure your business