Your First Workflow
Put it all together by creating your first membership plan, adding a member, and processing a check-in.
Step 1: Create Your First Membership Plan
Location: Memberships → Membership Plans → Add Plan
-
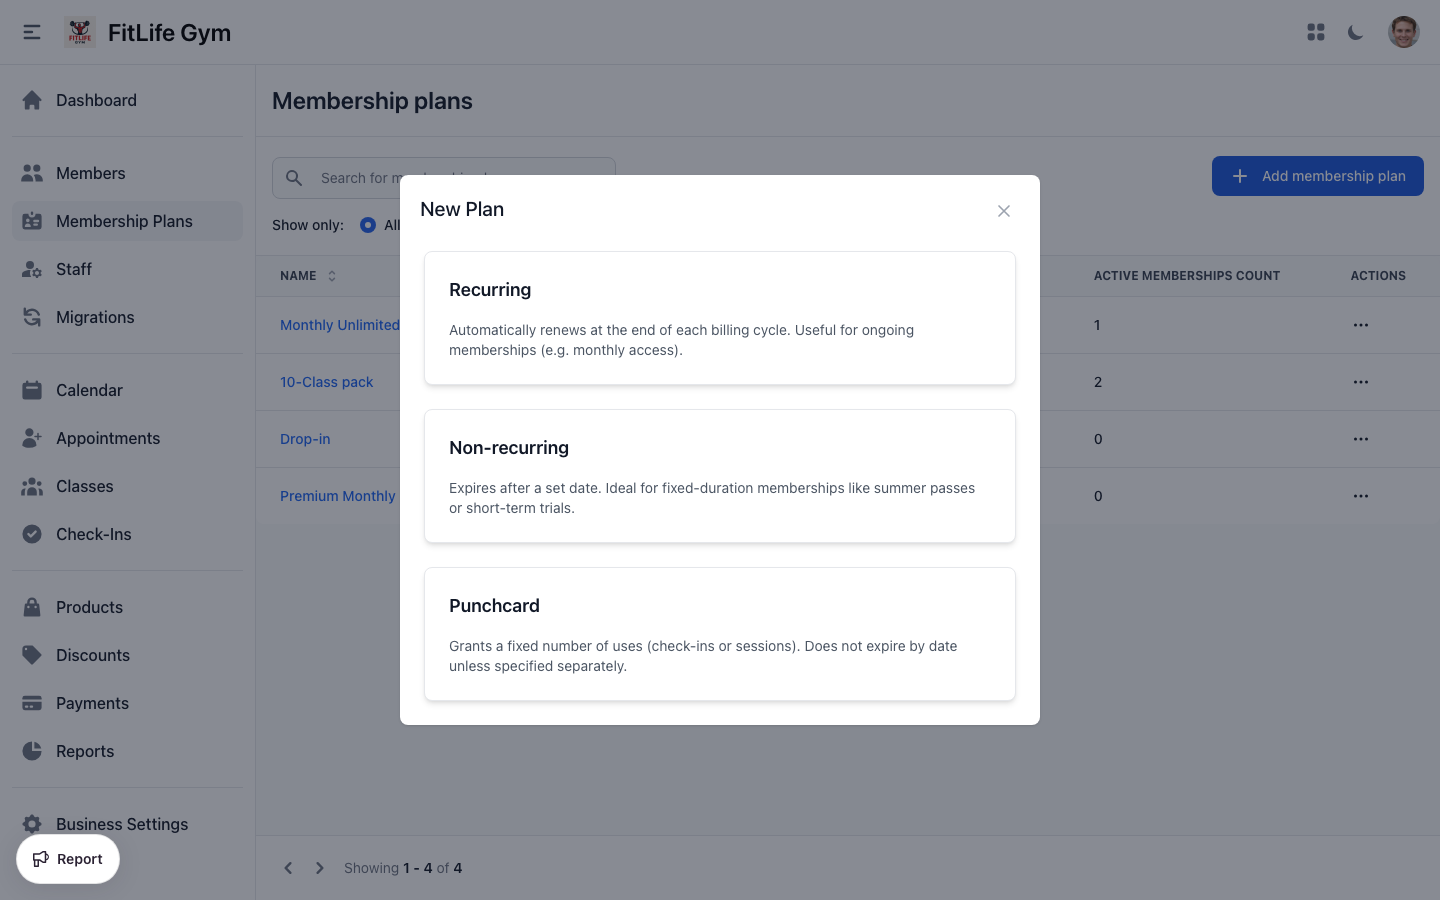
Click Add Membership Plan
-
Select the plan type:
- Recurring: Auto-renewing (monthly, weekly)
- Non-Recurring: One-time purchase with set duration
- Punchcard: Credit-based visits
-
Fill in the basic information:
- Name: e.g., "Unlimited Monthly"
- Description: What's included
- Setup fee: One-time joining fee (optional)
- Charge amount: Regular price
-
Configure billing (for Recurring plans):
- Interval: Monthly or Weekly
- Billing Day: When to charge
-
Click Save
Quick Start Example
Create an "Unlimited Monthly" plan:
- Type: Recurring
- Name: "Unlimited Monthly"
- Charge Amount: $99
- Interval: 1 Month
- Billing Day: Purchase Date
See the Membership Plans Guide for detailed configuration options.
Step 2: Add Your First Member
Location: Memberships → Members → Add Member
-
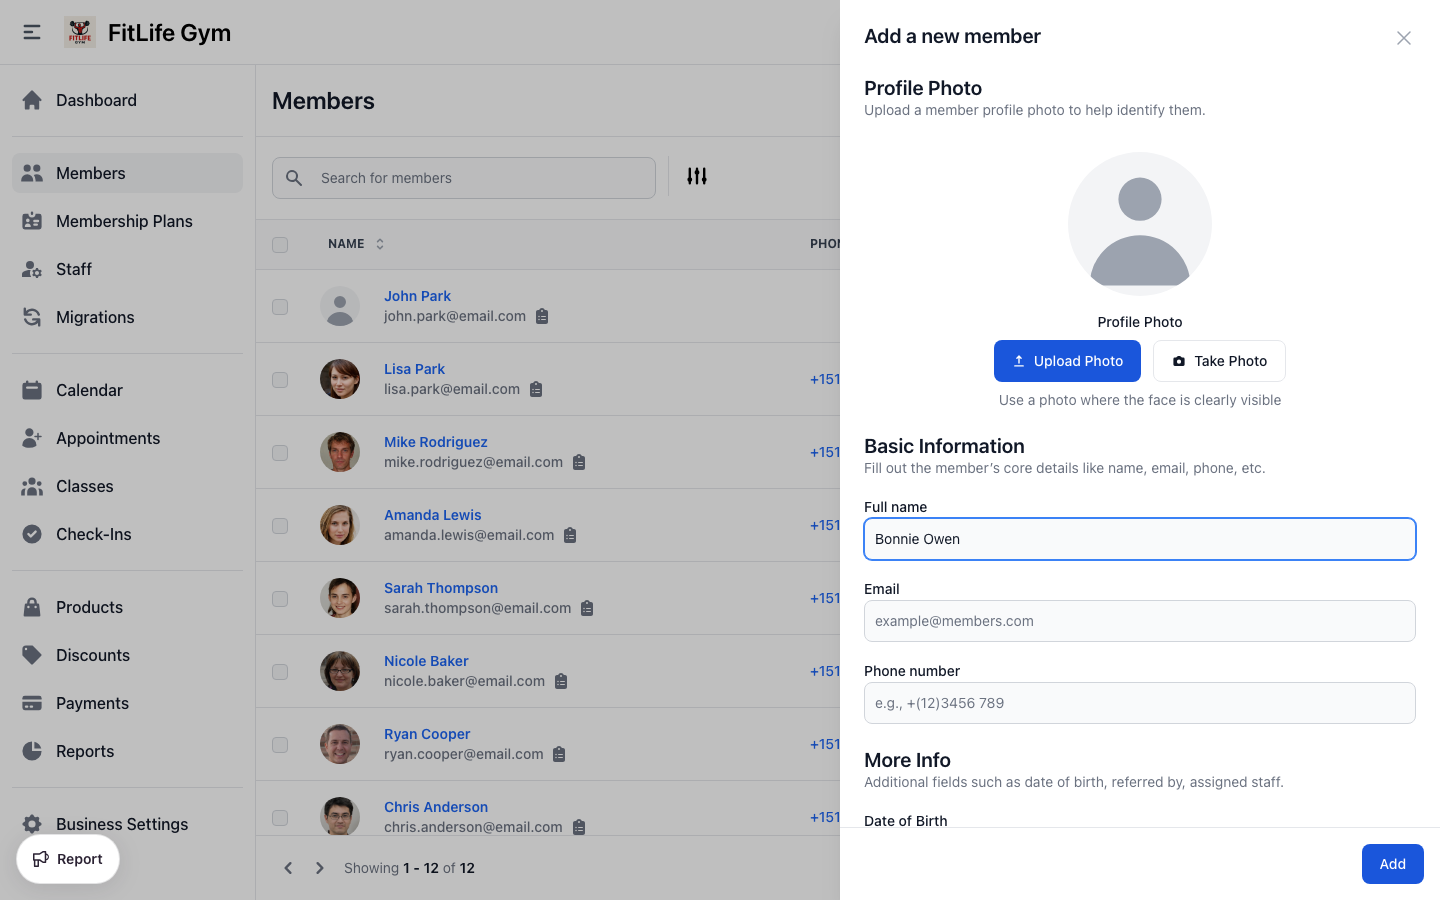
Click Add Member
-
Enter member details:
- Full name (required)
- Email (required - used for login and notifications)
- Phone number (recommended)
- Additional fields as needed
-
Click Save
Step 3: Assign a Membership
After creating the member:
- Go to the member's profile
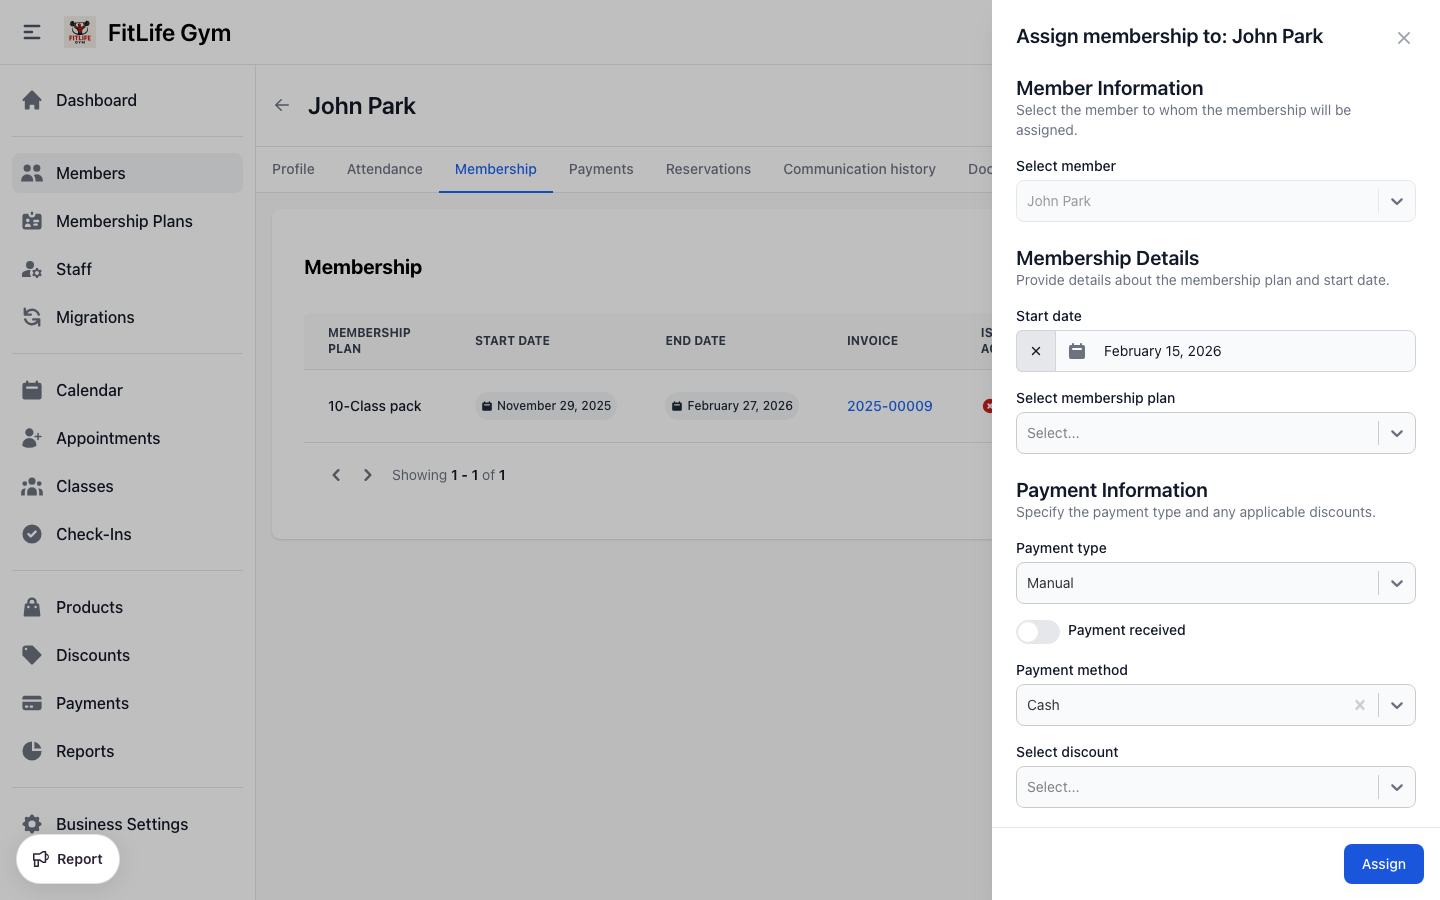
- Click the Memberships tab
- Click Assign Membership
- Select the membership plan you created
- Choose the payment type:
- Card (requires Stripe)
- Manual — then select a payment method: Cash (default) or any custom methods you've created
- Set the Start Date
- Apply a discount if applicable
- Click Assign
Step 4: Process Your First Check-In
Option A: From the Member Profile
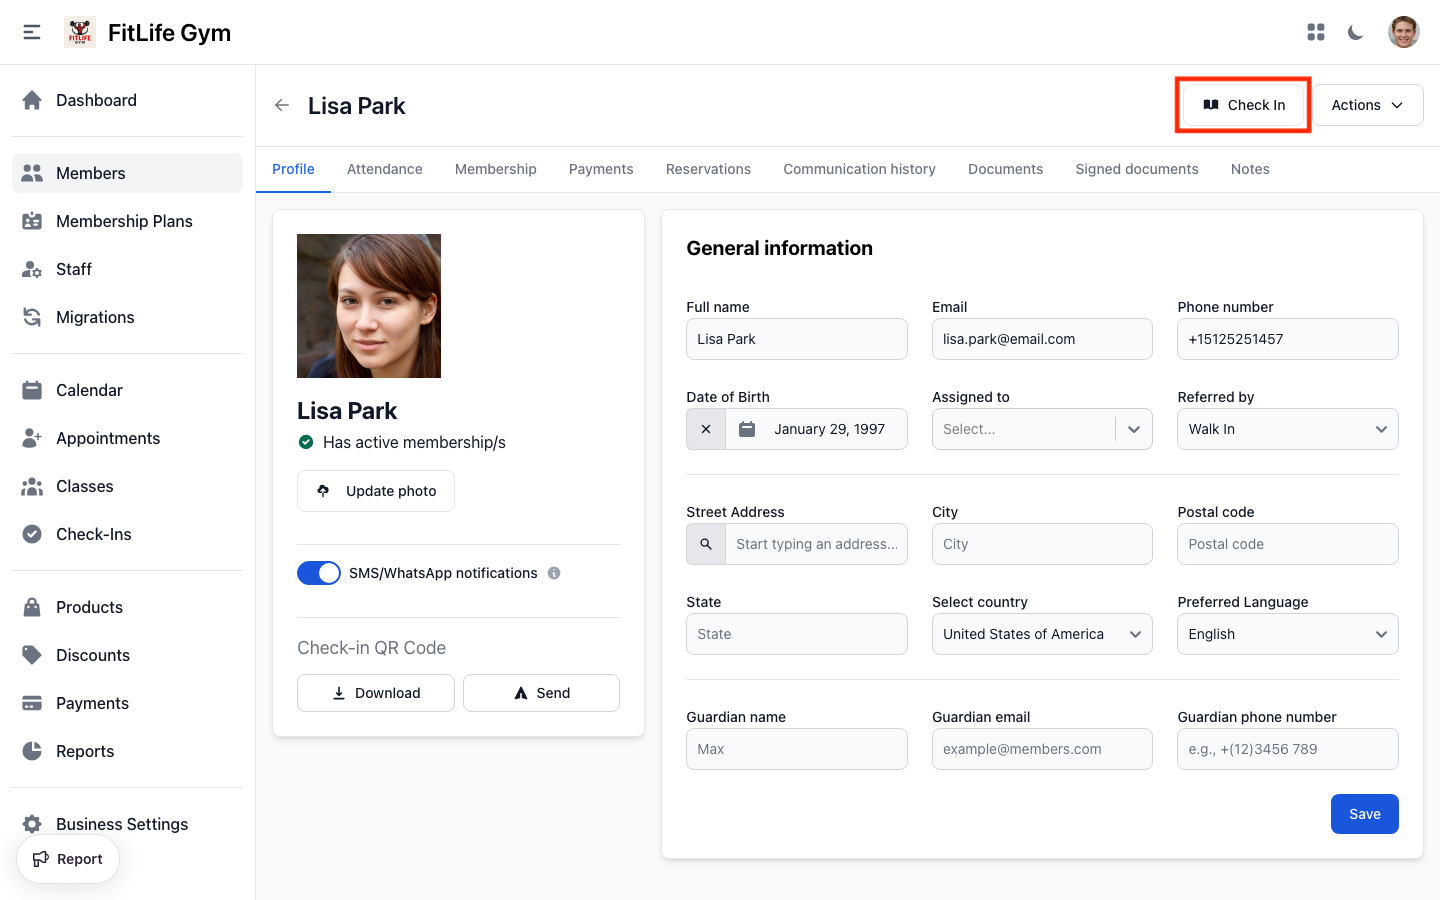
- Navigate to Members and select the member
- Click the Check In button in the profile header
- If the member has multiple memberships, select which one to use
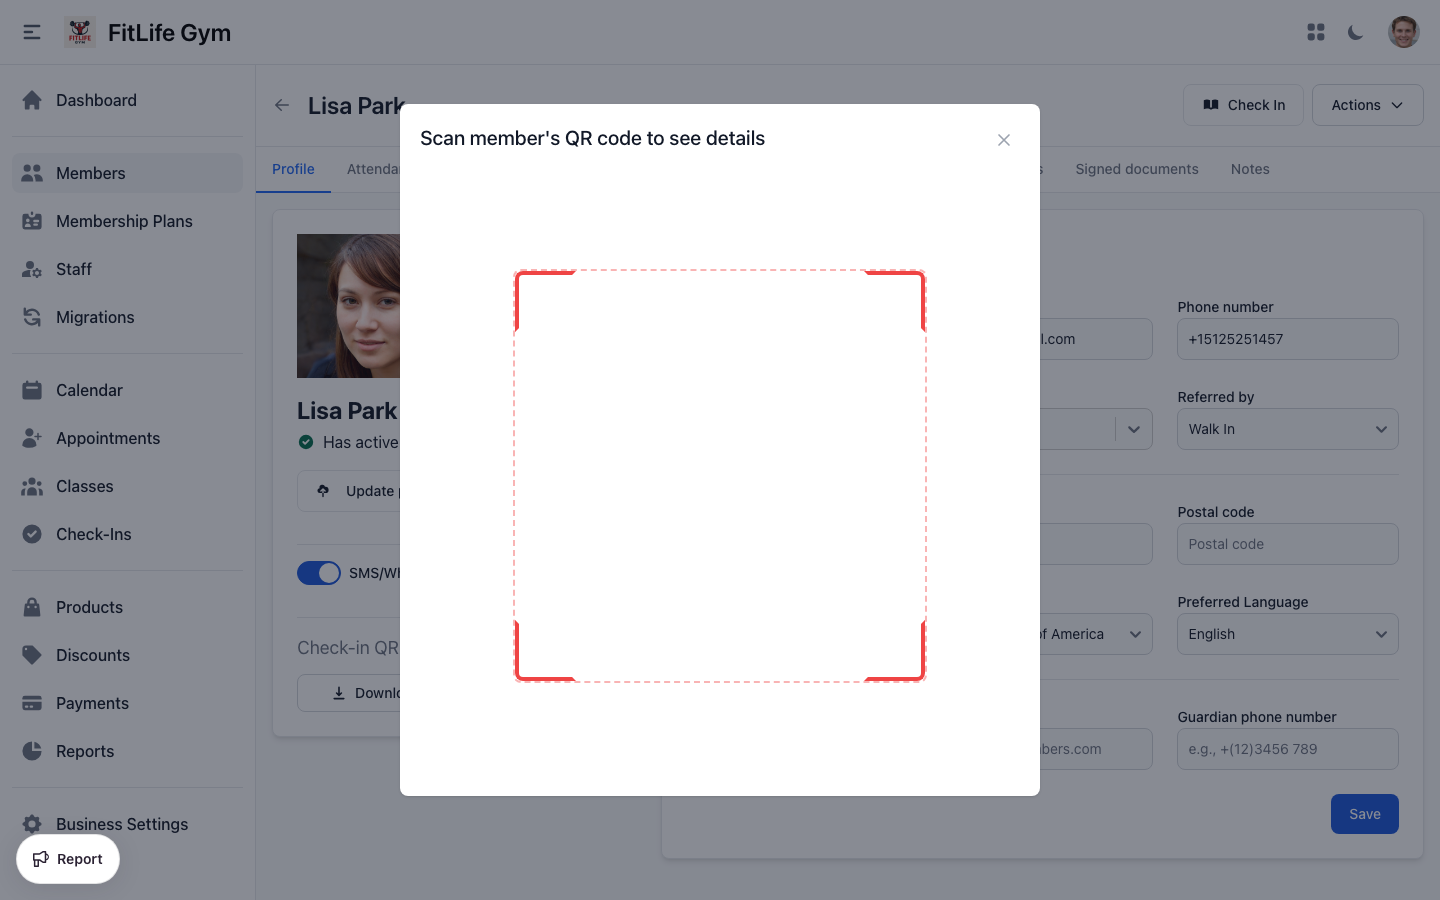
Option B: QR Code Scan
- Click the tools icon (grid) in the top navigation bar
- Select Scan member
- Member shows their QR code from the mobile app
- Scan to check them in
success
You've completed the basic setup workflow. Your gym is now ready to operate with Finegym!
Next Steps
Now that you've completed the basic setup, explore these features to get more from Finegym:
Recommended Next Steps
- Set Up Classes - Create your class schedule and let members book
- Configure Email Templates - Customize member communications
- Add Digital Documents - Create waivers for members to sign
- Import Existing Members - Migrate from your old system
- Add Staff Members - Give your team access
Learn More
- Membership Plans Guide - Deep dive into plan configuration
- Adding & Managing Members - Managing member profiles and operations
- Payments & Invoices - Understanding billing and transactions
- Reports & Analytics - Track your gym's performance
Get Help
- Email Support: Available on all plans
- Priority Support: Available on Growth plan
- Documentation: You're reading it!