Digital Documents
Create waivers, contracts, and agreements that members sign digitally. Documents are assigned automatically based on membership plans.
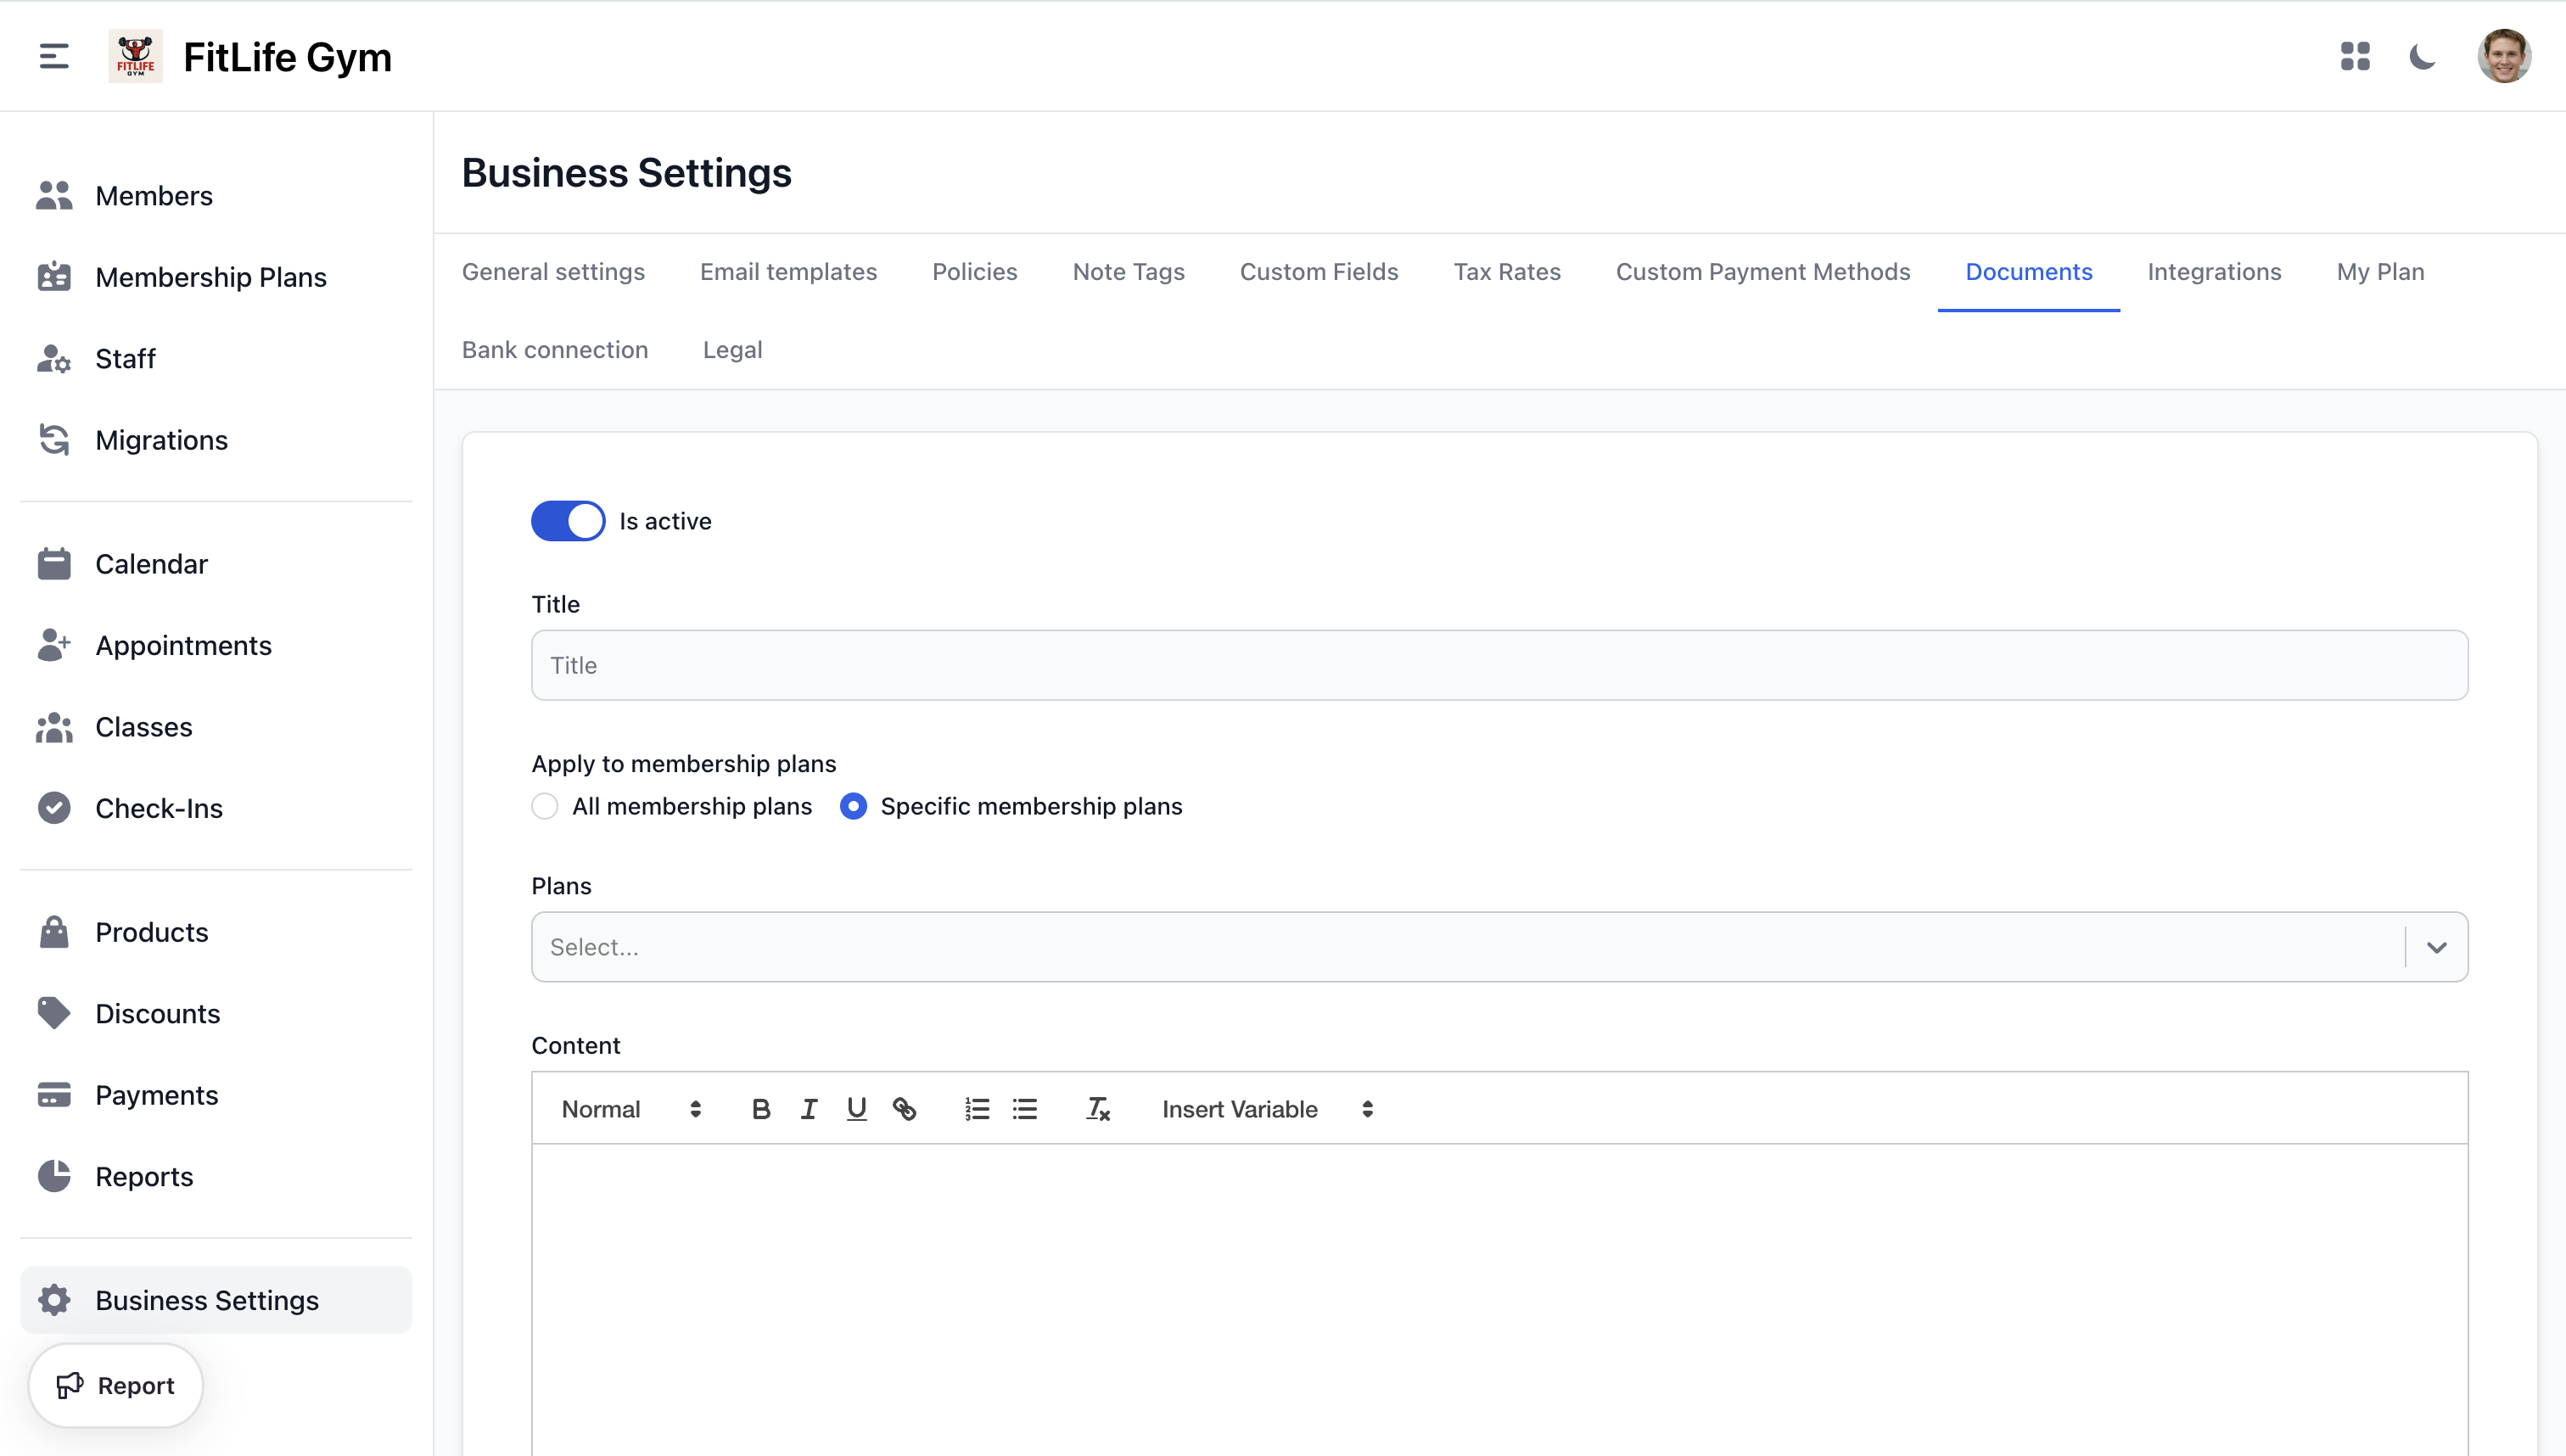
Creating a Document
Location: Settings → Documents
- Click Create digital document
- Toggle Is Active to enable the document
- Enter a Title (e.g., "Liability Waiver", "Membership Agreement")
- Write the document Content using the rich text editor
- You can insert dynamic variables for personalized content
- Choose plan assignment:
- All membership plans — every member sees this document
- Specific membership plans — only members on selected plans
- Click Publish
tip
Use Save as Draft if you're still working on the document and don't want members to see it yet.
How Assignment Works
Documents are automatically assigned to members based on their membership plan. There is no manual assignment to individual members.
- If a document is set to all membership plans, every member with an active membership will see it
- If set to specific plans, only members on those selected plans will see it
- When a member is assigned a matching plan, pending documents appear in their Documents tab
Managing Documents
Location: Settings → Documents
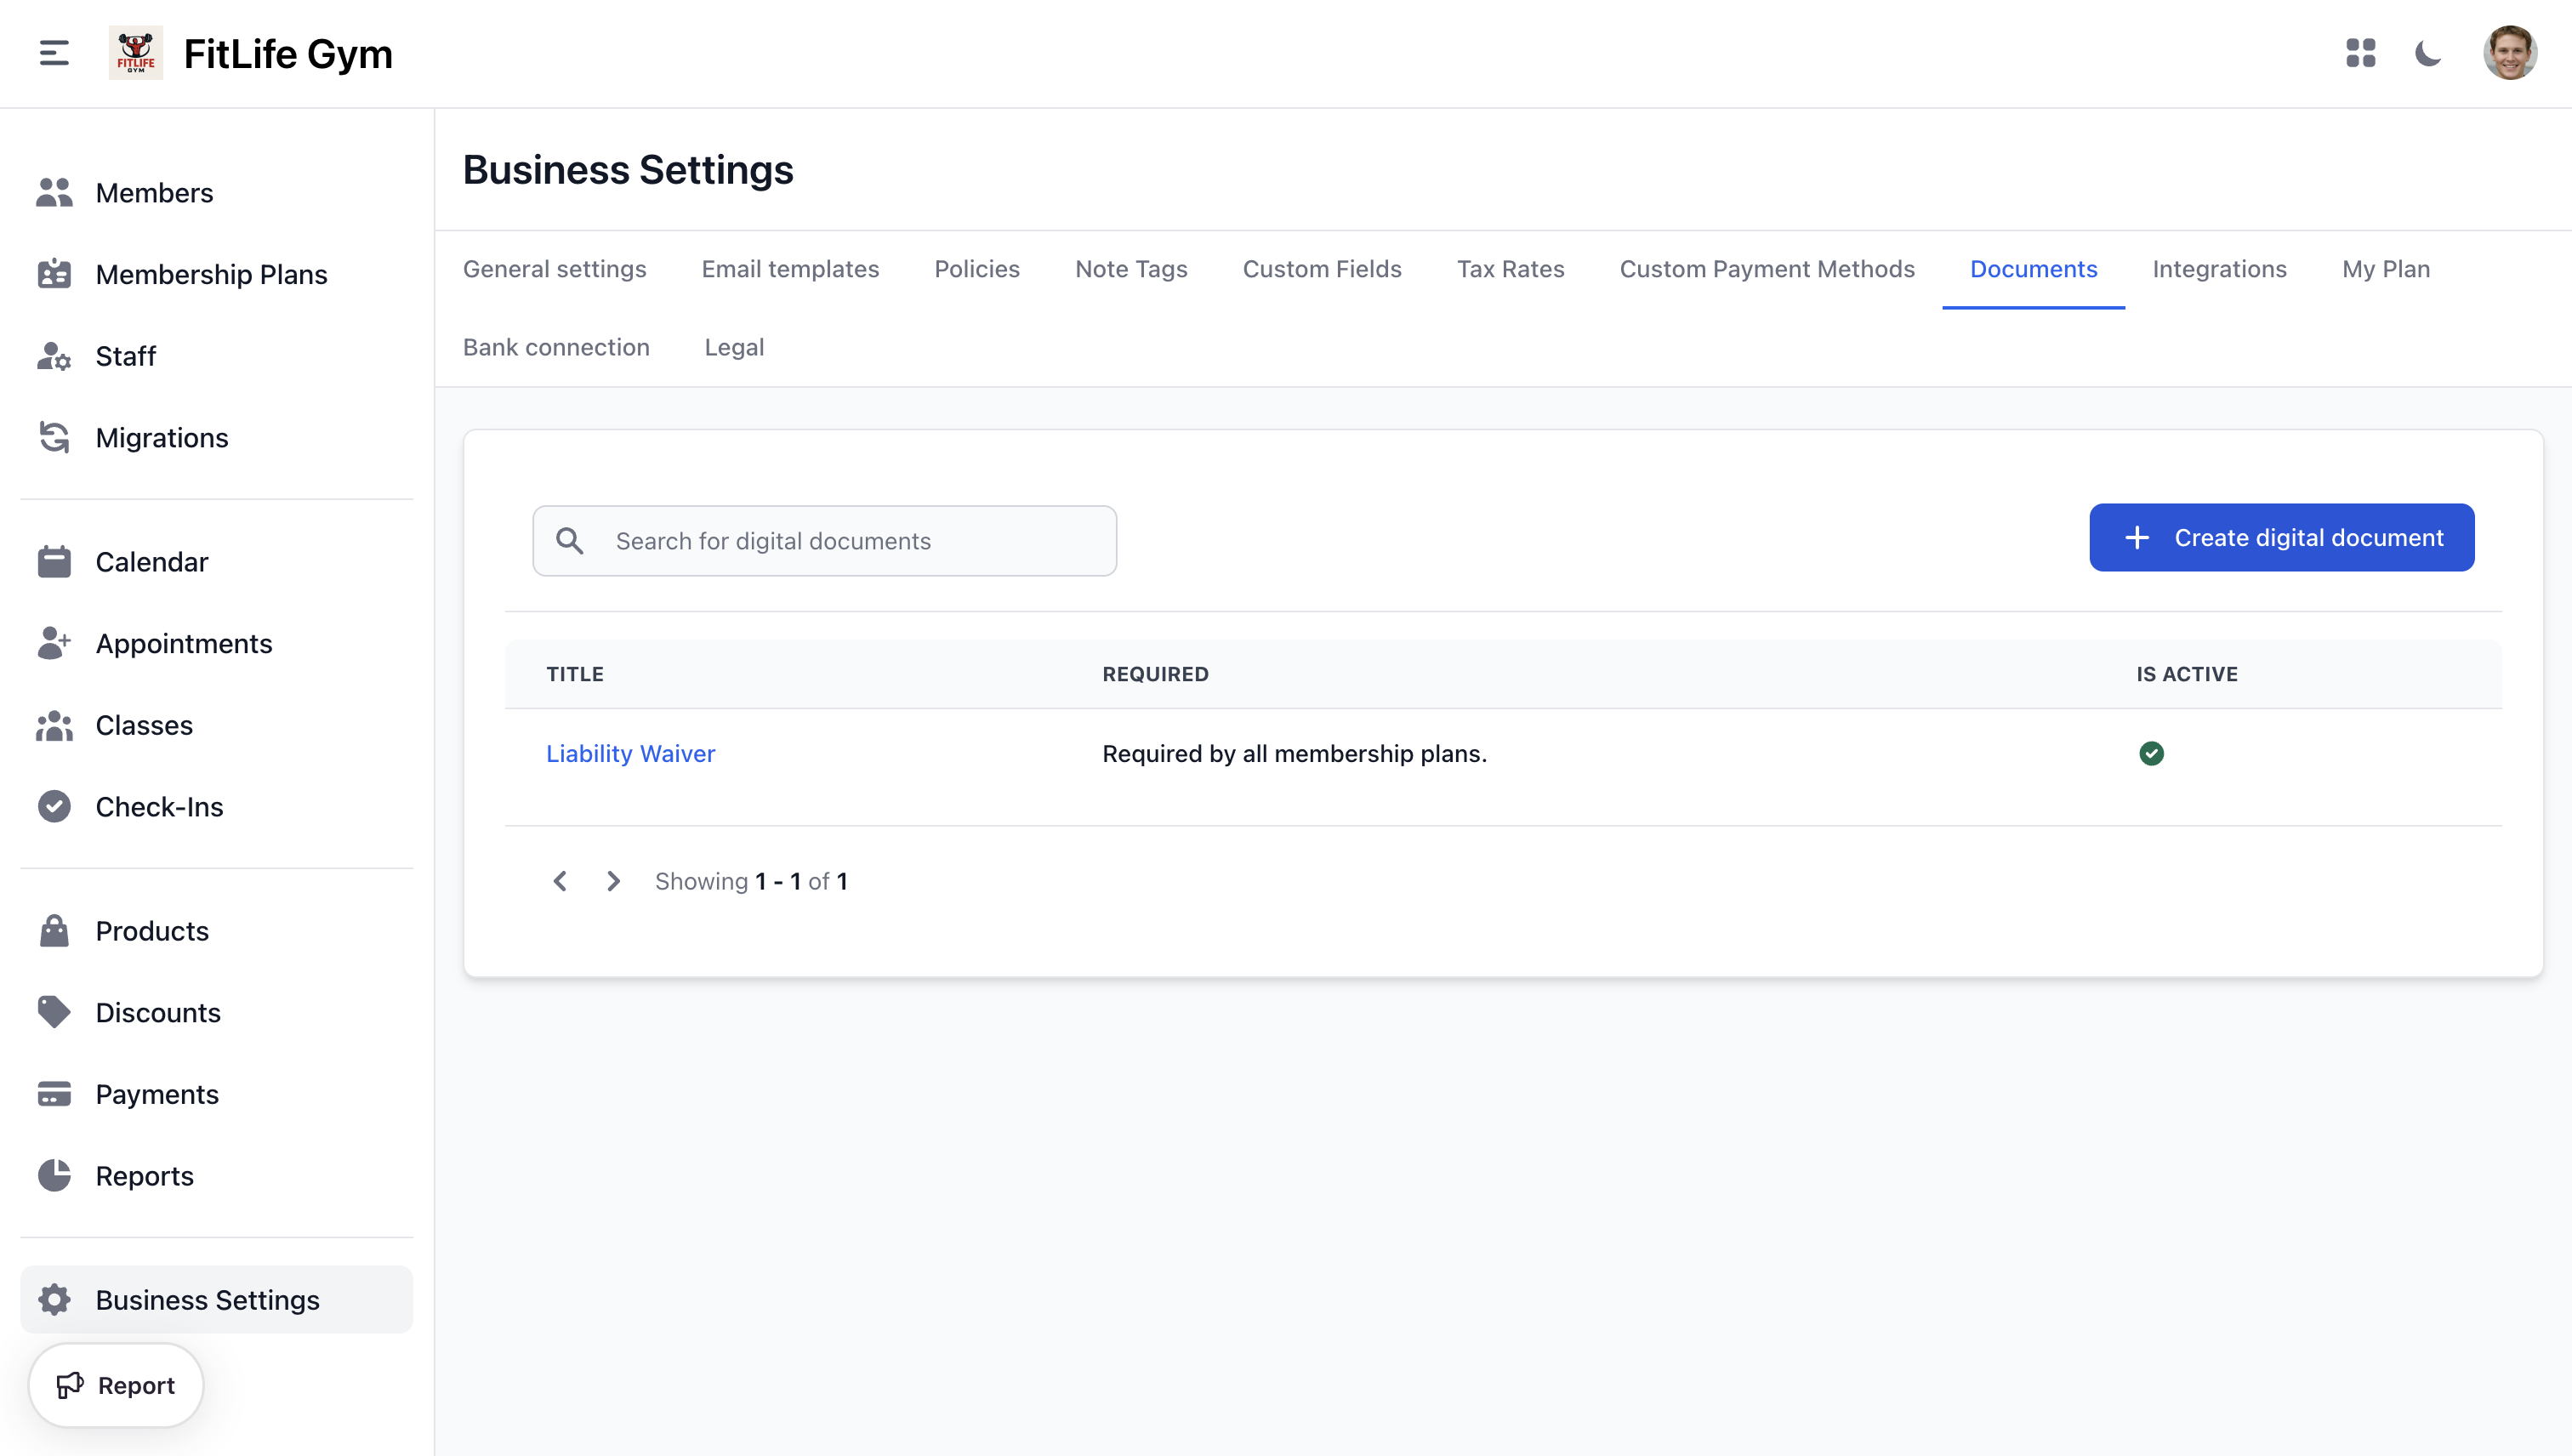
The document list shows:
- Title — document name (click to view details)
- Required — which plans require this document
- Is Active — whether the document is live
Document Detail Tabs
Click on any document to see three tabs:
- Info — Edit the document title, content, plan assignment, and status. You can also delete the document from here.
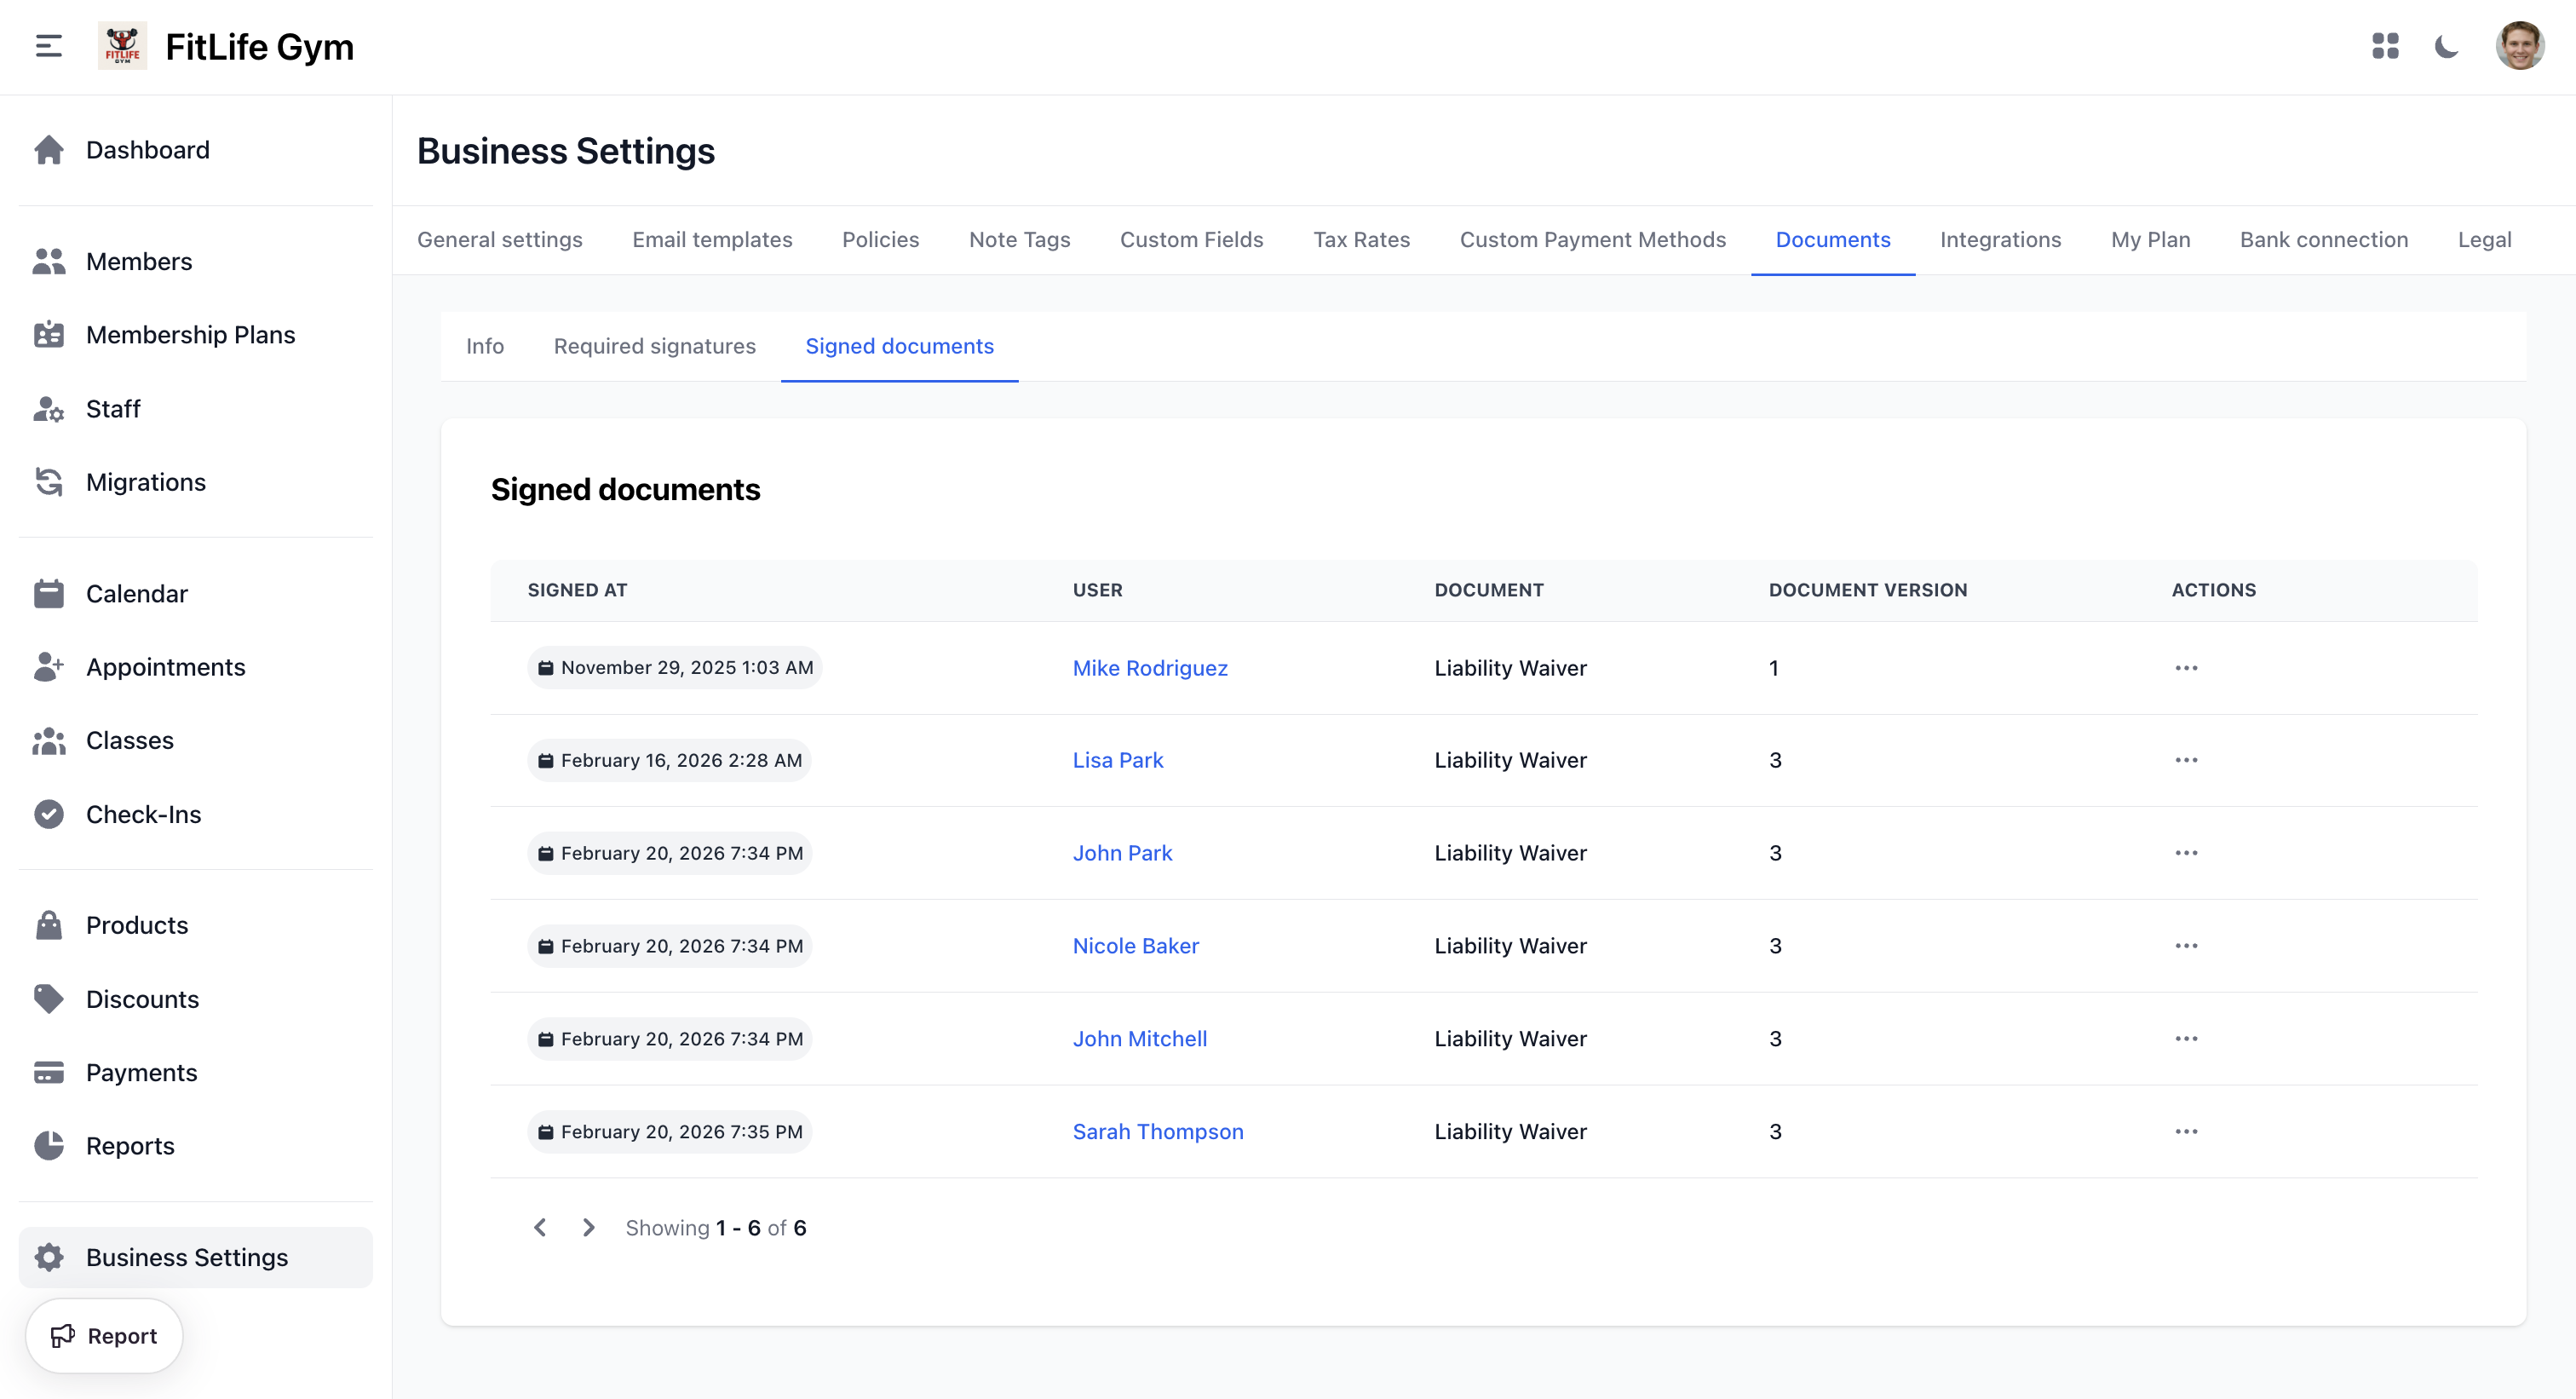
- Required Signatures — Members who need to sign this document
- Signatures — Completed signatures with signed date, member name, document version, and a download option
Signing Documents
Admin Signing on Behalf of a Member
- Go to the member's profile
- Click the Documents tab
- Click the action menu (⋯) on the pending document
- Select Sign document
- Draw the signature on the canvas
- Click Sign
Member Self-Signing (Mobile App)
Members can sign pending documents directly from the mobile app:
- Go to Menu → Documents
- Tap a document under Pending
- Review the document content
- Draw signature and submit
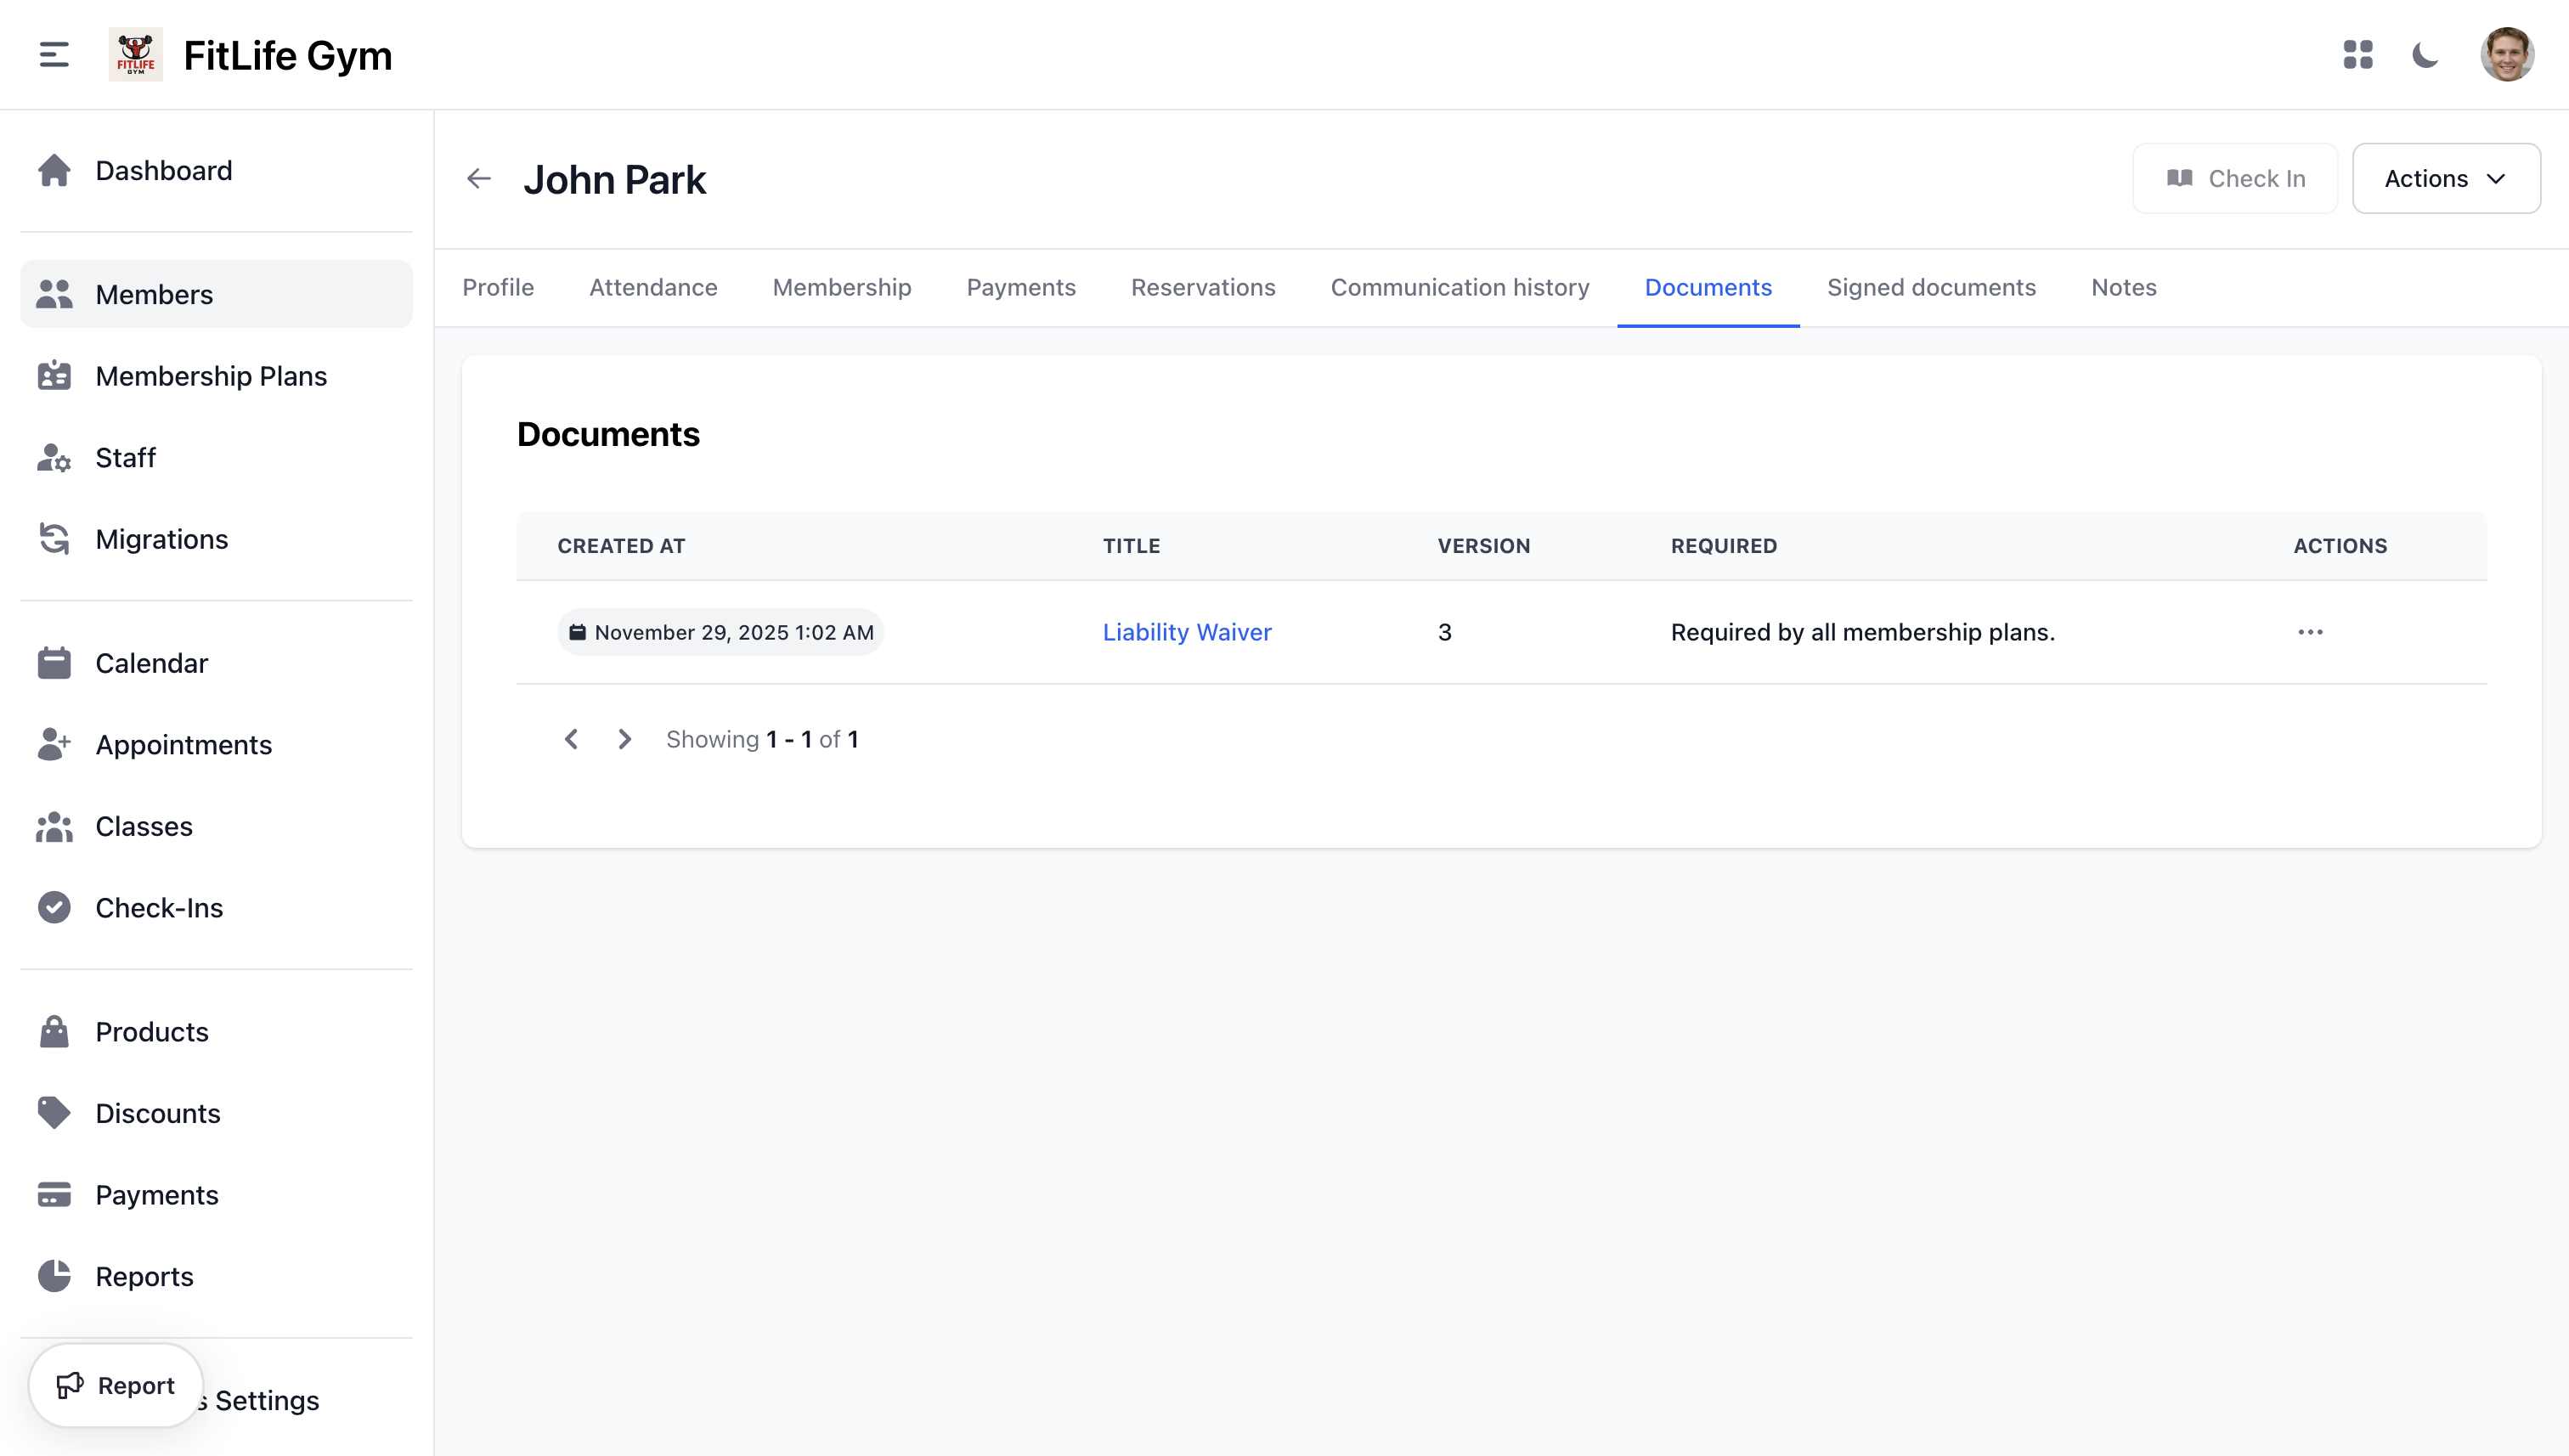
Viewing Signed Documents
From the Member Profile
The member's Signed documents tab shows:
- Signed at — date and time
- Document — document name
- Document version — which version was signed
- Actions — download the signed copy as PDF
From the Document Detail
Go to Settings → Documents → [Document] → Signatures to see all members who have signed, with download options for each.
Document Types
Common documents you might create:
- Liability Waiver — release of liability for injuries
- Membership Agreement — terms of the membership contract
- Health Questionnaire — pre-activity health screening
- Photo Release — permission to use photos/videos
- Minor Waiver — liability release requiring guardian signature
Best Practices
- Keep document language clear and concise
- Have legal counsel review waivers and contracts
- Use versioning — when you update a document, members who signed the old version are tracked separately
- Review the Required Signatures tab regularly to follow up on unsigned documents
- Set critical documents (like liability waivers) to all membership plans
Related Topics
- Policies & Legal — Terms of service and privacy policies
- Adding & Managing Members — Member profiles and management
- Membership Plans — Plans that trigger document requirements